Securus Net is a proxy that can be setup in either transparent or explicit mode to monitor network traffic from all network based devices.
NET sits as the middle man on the network, authenticated machines using the network would communicate through the NET proxy service. Packets are subject to Securus analysis where words and phrases are matched against the proprietary dictionary of terms. Any dictionary matches will result in an ‘event call’ where the software uses packet information to call on the website to produce the screenshot. Packet information regarding date & time and machine information will be sent along with the image.
NET can be installed to a virtual server or onto physical hardware, please refer to the Installation section below for product requirements and which installation options to use for a given scenario.
Securus NET can also integrate with other existing proxies to form a proxy chain. NET will come first in this chain, and then others will follow.
If you are currently using an explicit proxy (such as with LGFL) or multiple VLAN’s, Securus NET will need to be set up in explicit mode only.
Server Requirements
NET can be installed to standalone hardware in transparent or explicit mode or to a virtual machine (HyperV or VMware) in explicit mode only.
Note that the below serves as a guideline and is subject to network configuration and is irrespective of device type. Physical servers in a transparent setup will need two ethernet ports in order to function correctly.
Recommended Specification
Up to 800 connections
4 Core Processor
8GB RAM
Minimal storage space of 60GB (captures held in our cloud service)
No operating system required
NIC/Dual Network Card (Transparent only)
Generation 1 VM (if using HyperV)
Up to 2500 connections
8 Core Processor
12GB RAM
Minimal storage space of 60GB (captures held in our cloud service)
No operating system required
NIC/Dual Network Card (Transparent only)
Generation 1 VM (if using HyperV)
2500+ Connections
Server specification outlined in each case before implementation.
Please note that captures will broadcast to our highly secure cloud environment. You will be provided login details to the Capture Management portal to view the capture data.
Captures only occur in cases where a library term has been detected over the network. If you require an entirely on-site solution (XT server and NET), please contact us directly on 0330 124 1750 to discuss viability and options.
Mobile Device Requirements
iOS 13 or higher
Android 4.4.2 or higher
Firewall Requirements
We recommend whitelisting the following address on the firewall to allow full communication to our services.
• Net1.securus-software.com
• Net-license.securus-software.com
• Support.prosyscor.com
CentOS Mirrors:
mirrors.fedoraproject.org
mirrorlist.centos.org
Securus NET Installation
The server MUST have unfiltered internet access during the install process to ensure the software and updates are installed properly.
If any of the below options or settings are missing from your installation, please contact the support team to get the most recent copy of the Securus NET ISO.
Installation – Explicit Mode
Installing in explicit mode would require the Securus NET proxy to be defined on the devices that are to be monitored. This can be automated to a number devices using an Mobile Device Management (MDM) service or individually on each device.
Explicit installs can be better for networks where only a small number of static devices (such as Apple Macs) need to be monitored.
Burn the ISO to a disc or USB and insert if installing to hardware or simply mount it to a new Virtual Machine.
We recommend balenaEtcher if using a USB for hardware installs.
Boot the server from disc/ISO to start.
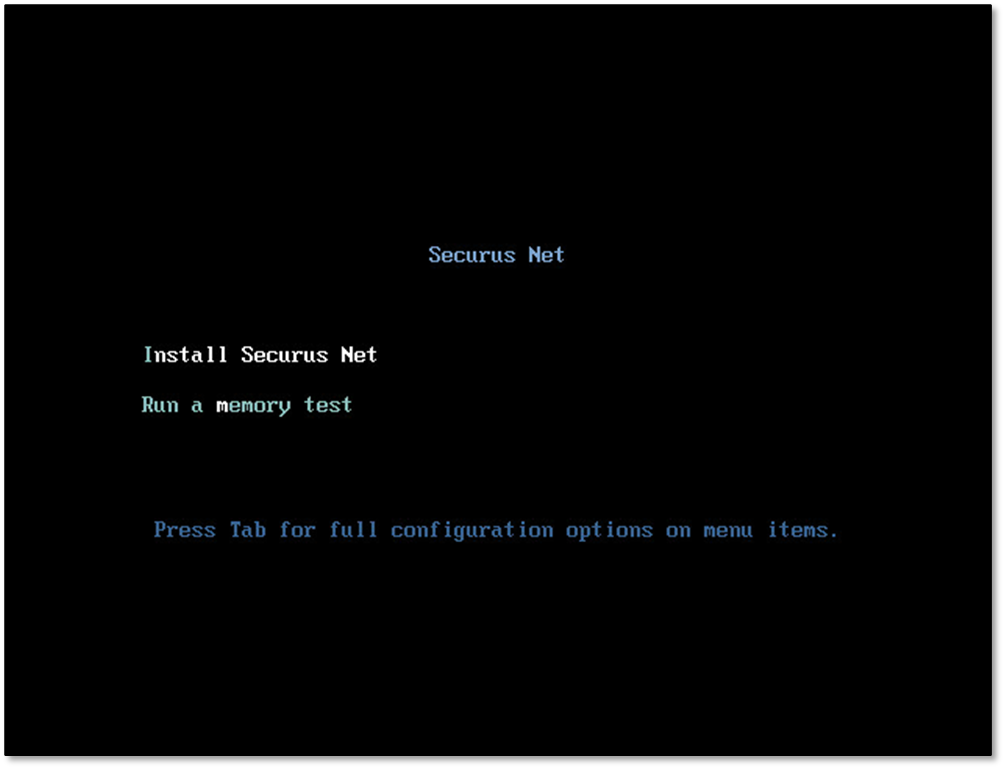
Start the installation process and configure the following options when prompted.
Which Securus Cloud server do you belong to?
This defines the server you will be connecting to – i.e. cloud08. This will be provided by Securus support in the setup email.
Which OU does your school belong to?
Defines your schools OU on the server – i.e. LeatherheadPrimarySchool. This will have been provided in your initial installation email.
Which IP address should I use?
The IP address that you are allocating to the Net installation.
Which gateway should I use?
Type in Your gateway address.
Which DNS addresses should I use?

Enter your DNS addresses, separated by commas as shown in the example above.
Which Netmask should I use?
Enter your netmask address.
Do I require a proxy?

Type Y or n.
If Yes, enter your proxy information if required (eg: http://domain\username:password@ipaddress:port)
Which authentication method would you like to use?
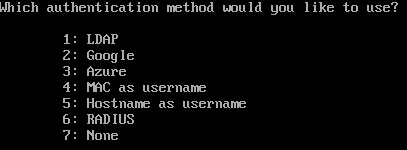
This option is for the authentication method the Captive Portal will use to handle logins. For more information on the Captive Portal, please click here.
LDAP
Will use LDAP, integrating with your Active Directory. Users will need to login with their Active Directory details. This will also provide their Active Directory username for the capture information.
Google
Will use Google’s SSO authentication within the Captive Portal.
This is best for 1:1 device assignments as Google’s authentication will usually keep the same user logged in once they have authenticated with a device. With Google SSO enabled, the captive portal will redirect to the Google login page and will log the user into their Google account via browser session. Securus NET will grab these details from the browser session and use the domain and username for captures.
Users will need to log out of any Google account sessions manually and left idle for more than 3 minutes (configurable) to force re-authentication for a new user in shared device environments.
Azure
Will use Azure SSO authenticaton within the Captive Portal.
Similar to Google, this is best for 1:1 devices and users will need to sign out from Microsoft within their browser sessions to allow a new user to sign in with shared device environments.
MAC as username
Will hide the Captive Portal (no login necessary) and will attempt to use the devices MAC address as the username for captures.
Hostname as username
Will hide the Captive Portal (no login necessary) and will attempt to use hostname of the device as the username on captures.
Radius
Like option 1, this enables the Captive Portal with LDAP authentication and also enables Radius support. Once this option is selected, the server will look for and accept Radius network packets that pushed to it.
None
Will disable the Captive Portal entirely and will display the devices IP address as the username instead.
Hostname and MAC address authentication requires Private Wi-Fi Address to be turned off to work correctly.
You will be asked to confirm that the settings are correct. Type ‘Y’ and press enter to continue.
If you have made a mistake, type ‘n’ and press enter and select which section you would like to change. Network settings can also be changed post install.
Press:
To change the cloud information or OU name.
To change the network information assigned to the device.
To change the selected authentication method.
After this process the network configuration utility will start.
A prompt will ask if the server is to be in transparent or explicit mode. Type E for explicit and press enter to confirm your choice.

The next prompt will then ask you to connect the Internet line to the appropriate port and will detect that the link is established.

The installation will now begin and can take up to 15 minutes to complete.
Once the install has finished, you will be presented with the Securus NET console screen. Please move onto the Post Install section.
Installation - Transparent Mode (Hardware Only)
The server MUST have unfiltered internet access during the install process to ensure the software and updates are installed properly.
Installing transparently is most useful when there are multiple devices entering and leaving the school network on a regular basis (mobile phones and laptops etc). Devices entering the network will automatically be monitored by Securus NET.
Burn the ISO to a disc or USB and insert if installing to hardware or simply mount it to a new Virtual Machine.
We recommend balenaEtcher if using a USB for hardware installs.
Boot the server from disc/ISO to start.
Start the installation process and configure the following options when prompted.
Which Securus Cloud server do you belong to?
This defines the server you will be connecting to – i.e. cloud08. This will be provided by Securus support in the setup email.
Which OU does your school belong to?
Defines your schools OU on the server – i.e. LeatherheadPrimarySchool. This will be provided by Securus support in the setup email.
Which IP address should I use?
The IP address that you are allocating to the Net installation.
Which gateway should I use?
Type in Your gateway address.
Which DNS addresses should I use?
Enter your DNS addresses, separated by commas as shown in the example above.
Which Netmask should I use?
Enter your netmask address.
Do I require a proxy?
Type Y or n.
If Yes, enter your proxy information if required (eg: http://domain\username:password@ipaddress:port)
Which authentication method would you like to use?
This option is for the authentication method the Captive Portal will use to handle logins. For more information on the Captive Portal, please click here.
LDAP
Will use LDAP, integrating with your Active Directory. Users will need to login with their Active Directory details. This will also provide their Active Directory username for the capture information.
Google
Will use Google’s SSO authentication within the Captive Portal.
This is best for 1:1 device assignments as Google’s authentication will usually keep the same user logged in once they have authenticated with a device. With Google SSO enabled, the captive portal will redirect to the Google login page and will log the user into their Google account via browser session. Securus NET will grab these details from the browser session and use the domain and username for captures.
Users will need to log out of any Google account sessions manually and left idle for more than 3 minutes (configurable) to force re-authentication for a new user in shared device environments.
Azure
Will use Azure SSO authenticaton within the Captive Portal.
Similar to Google, this is best for 1:1 devices and users will need to sign out from Microsoft within their browser sessions to allow a new user to sign in with shared device environments.
MAC as username
Will hide the Captive Portal (no login necessary) and will attempt to use the devices MAC address as the username for captures.
Hostname as username
Will hide the Captive Portal (no login necessary) and will attempt to use hostname of the device as the username on captures.
Radius
Like option 1, this enables the Captive Portal with LDAP authentication and also enables Radius support. Once this option is selected, the server will look for and accept Radius network packets that pushed to it.
None
Will disable the Captive Portal entirely and will display the devices IP address as the username instead.
You will be asked to confirm that the settings are correct. Type ‘Y’ and press enter to continue.
If you have made a mistake, type ‘n’ and press enter and select which section you would like to change. Network settings can also be changed post install.
Press:
To change the cloud information or OU name.
To change the network information assigned to the device.
To change the selected authentication method.
After this process the network configuration utility will start.
A prompt will ask if the server is to be in transparent or explicit mode.
Type T for transparent and press enter to confirm your choice.
The next prompt will then ask you to connect the Internet line to the appropriate port and will detect that the link is established. It will then ask you for the LAN line and perform the same link check.
The installer will then run through the rest of the install process and you will be presented with the Securus NET Terminal Interface. Please move onto the Post Install section at this point.
Post Install
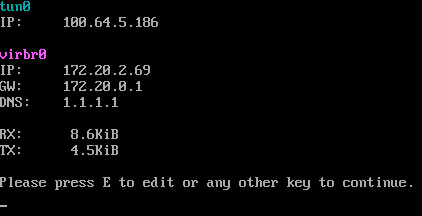
Once the installation is complete, you will be presented with the Securus NET Terminal Interface.
Here you will find some troubleshooting options to help identify where a connection issue may lie.
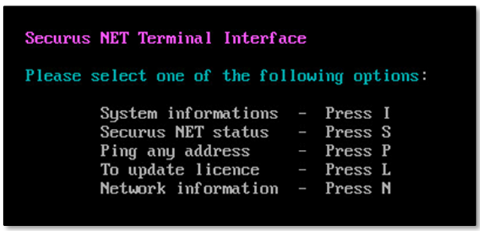
I - System Information
This will show which cloud service the NET server is connected to, system uptime, CPU usage and storage usage.
S - Securus NET Status
This will show whether the NET services are up and connected.
P - Ping any address
Will allow you to ping internal or external devices to test for connectivity.
L - Update Licence
Allows you to update the licence, can also be used to query the licensing server to check for connectivity outside of the network.
N - Network Information
This will show the network details that are currently assigned to the device. If no tunnel address is shown, please check your firewall and ensure the addresses listed in the Firewall Requirements section are whitelisted.
It is recommended that the connection and capture creation be tested once the installation is complete. Please read on for the next steps depending on the installation type.
If you get stuck or need any further advice, please do not hesitate to contact the support team.
Changing Network Information Post Install
Changing the network details that are assigned to the device can be done post install if necessary. To do this, press N on the Securus NET Terminal Interface to take you to the Network Information screen.
Press E to edit the currently assigned details. This will show a screen asking which details to edit.
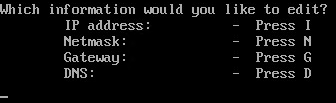
Press:
I to change the IP address address.
N to change the Netmask address.
G to change the Gateway address.
D to change or add DNS address(es).
Type in your changes and press enter to complete. The process may take a few minutes to complete and you will be taken back to the Network Information screen once the change has been successfully made. The new details will be shown in this screen.
Capture Testing
The final stage of the NET installation is to ensure the proxy is working by created a test capture.
Explicit – Capture Test
Set a devices proxy to the server’s IP address with port 3128 and make an exclusion for the local network – example 172.20.*. This will later need to be set for every device being monitored by NET and can be done via MDM.
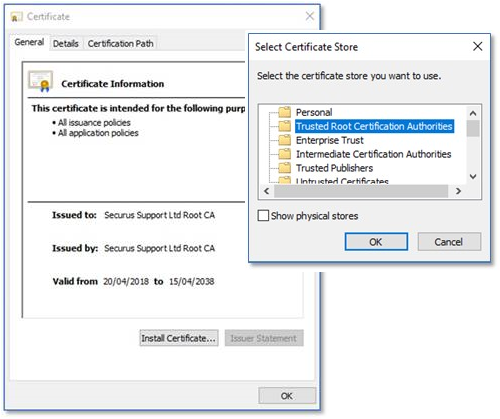
Our certificate will then need to be installed on the device, this can be downloaded from here: https://support.securus-software.com/securus.crt.
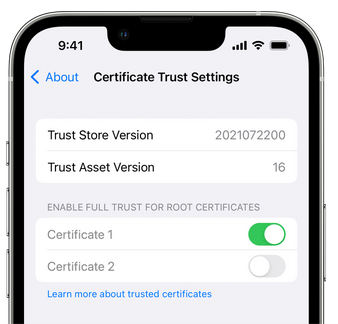
Install the certificate as a root authority on the test machine (images for Windows below). If installing onto iOS, the certificate will also need to be trusted.
Then go to Wikipedia and search for AK47. If enabled during install, the Securus NET Captive Portal will show.
Login with your Active Directory details and the webpage will continue to load as normal. You may also need to open a new tab and complete the search again.
Google.com is on the whitelist and the search will complete without authentication. If enabled, the Captive Portal will display when a Google search result or another web address is accessed.
This should then generate several captures that can be then viewed in the Securus console.

Other phrases that can be used to test with are “ISIS”, “Fortnite”, “Roblox, or “Our Secret”.
The proxy can now be deployed site wide to mobile devices using an MDM.
Transparent – Capture Test
Our certificate will then need to be installed on the device, this can be downloaded from here. Install the certificate as a root authority on the test machine (instructions below).
Install our certificate onto test machine (a laptop if available) and plug it into the second ethernet port. The certificate can be downloaded from here. Install the certificate as a root authority on the test machine (instructions below).
Once this is done, attempt to browse the internet.
If enabled, the Securus NET server will block your connection and put up the Captive Portal and will ask you to login. Your Active Directory IP address should have been entered during the install, so it will already be linked to the schools Active Directory.
Login with your Active Directory credentials. Once a successful login has occurred, you will be prompted to continue browsing the internet.
Generate a test capture by browsing to Wikipedia and searching for AK47.
Google.com is on the whitelist and the search will complete without authentication. If enabled, the Captive Portal will display when a Google search result or another web address is accessed.
This should then generate several captures that can be then viewed in the Securus console.
Other phrases that can be used to test with are “ISIS”, “Fortnite”, “Roblox, or “Our Secret”.
The server will then to be deployed in line, between the firewall/router stack and the LAN or wireless network, depending on your network configuration.
Useful Information
Lightspeed MDM
If using Lightspeed MDM on site you should enable a setting called “Bypass captive login iOS10+”. This will fix any issues with the captive portal not loading or redirecting and WiFi disconnects when not authenticated.
Certificate Installation instructions:
iOS: https://support.apple.com/en-gb/HT204477#:~:text=If%20you%20want%20to%20turn,Mobile%20Device%20Management%20(MDM).
Captive Portal Information: Captive Portal
Securus NET Certificate download: https://support.securus-software.com/securus.crt