Introduction
Virtual Securus XT servers can now be deployed on HyperV or VMware by importing the virtual machine from a file instead of installing from an ISO.
This document will explain the procedure for both environments and how to configure the server after deployment.
Recommended Server Spec
Our recommended spec for 45 days retention is:
150GB Hard disk,
2 core processor,
8GB RAM,
Static MAC address.
If using Hyper-V, select a Generation 1 VM if prompted.
Capture Retention
The Securus XT server includes a capture retention policy based on a set number of days. Old data is removed for new when this threshold is met, this occurs after the daily reboot.
The default retention values are listed below.
All un-viewed, viewed and ignored captures:
45 Days
Deleted captures:
45 days
Saved captures:
180 days (from the date of saving)
These values can be changed at any time by a member of the support team in a remote session. Do not hesitate to contact support should there be any need further clarification on these values.
Other Information
The server will reboot at 22:00 every night as part of a daily maintenance routine.
The Webmin console can be used to update OS packages when needed.
VMware Deployment
The VMware server template will be provided in a .OVA format. Place the provided OVA file in a suitable location.
The server settings will need to be edited to add the appropriate system resources and networking before use.
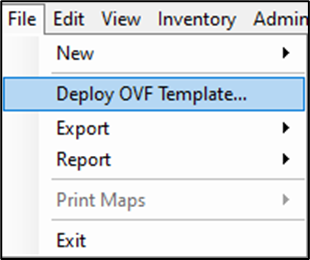
Within VMware click on File > Deploy OVF Template.
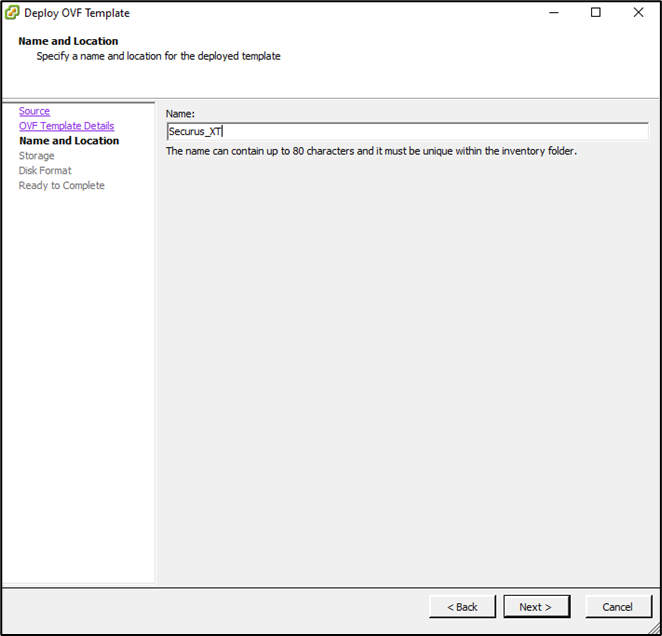
Browse to the file location and click Next. Click Next again to continue to Name and Location.
Name the new VM and click Next.
Under Storage, select a suitable disk for the server to reside on, then select the preferred Disk Format and click Next.
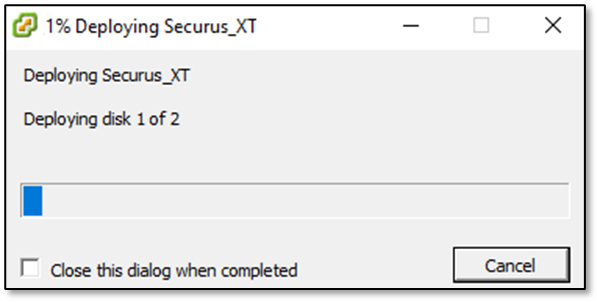
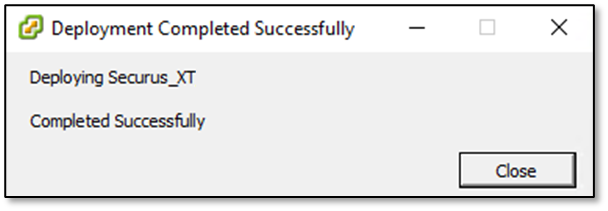
Check over the settings on Ready to Complete. Click Finish to start the import.
The import process will start, and the dialogue window will show when it has finished successfully.
Virtual Machine settings can be changed to match the recommended specification after the import has completed.
Please note that the VM will have two disks, a storage drive where the captures are held (150GB) and a smaller drive that houses the OS (16GB).
HyperV Deployment
The HyperV server template will be provided as a bundle of files and folders, ready for importing.
The server settings will need to be edited to add the appropriate system resources and networking before use.
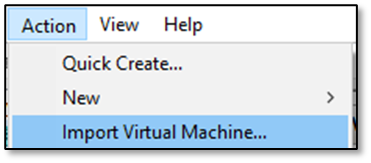
Click on Action > Import Virtual Machine…
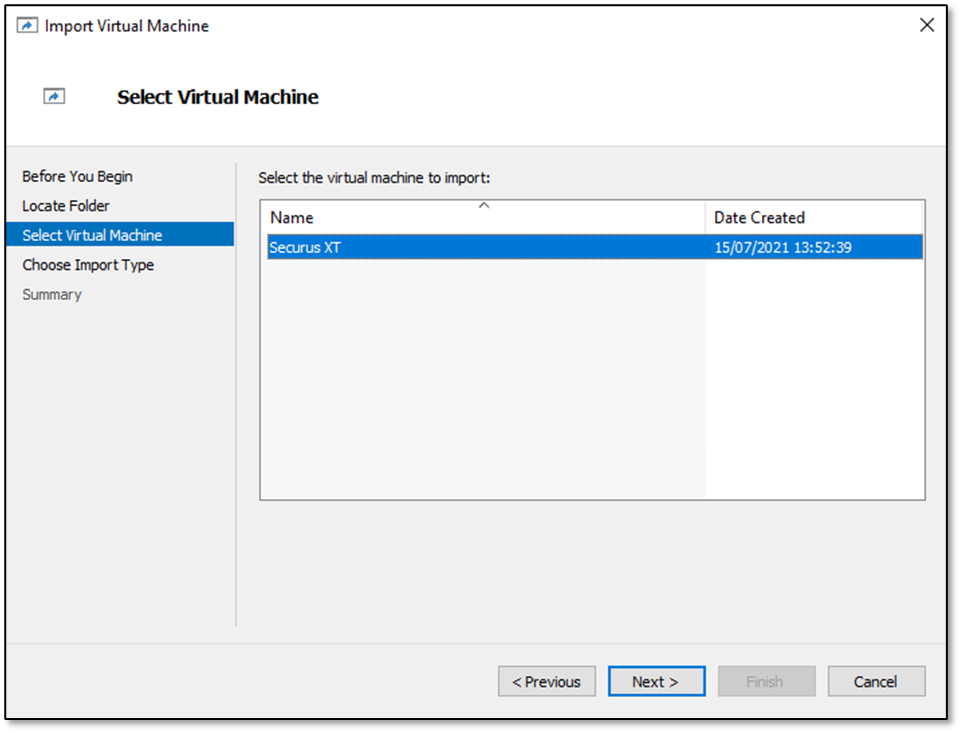
On the Locate Folder section, click Browse and navigate to the file location.
Select the correct Virtual Machine and click Next.
Choose the preferred import type and click Next, then change the destination and storage folders if required. Click Finish on Summary to complete the import.
The VM will have two disks, one for capture storage and one for the OS.
Virtual Machine Console
The VM console window will show useful information like the Securus version, currently assigned network details, remaining disk space and how many operating system updates are available.
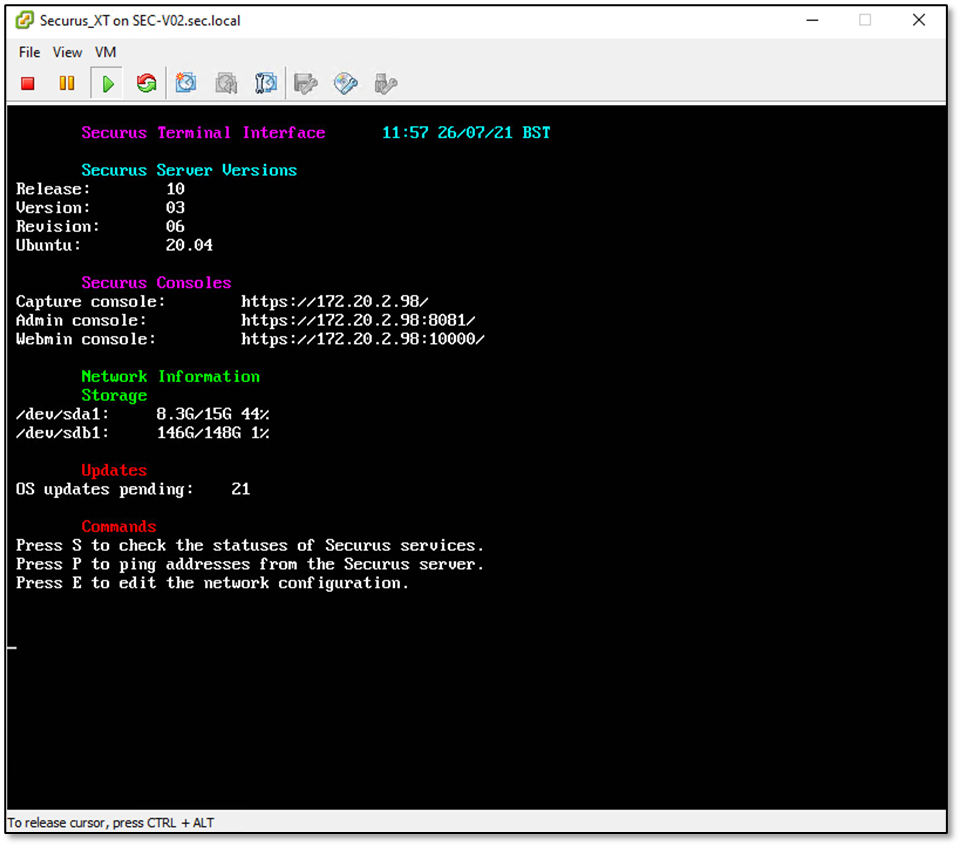
Pressing S in this window will show if the Securus services are up and running.
Pressing P gives the option to ping external and internal IP addresses or hostnames to test connectivity.
Pressing E will allow for changes to the network configuration on the server.
Post Import Configuration
In the VM console window, press E to edit the network configuration.
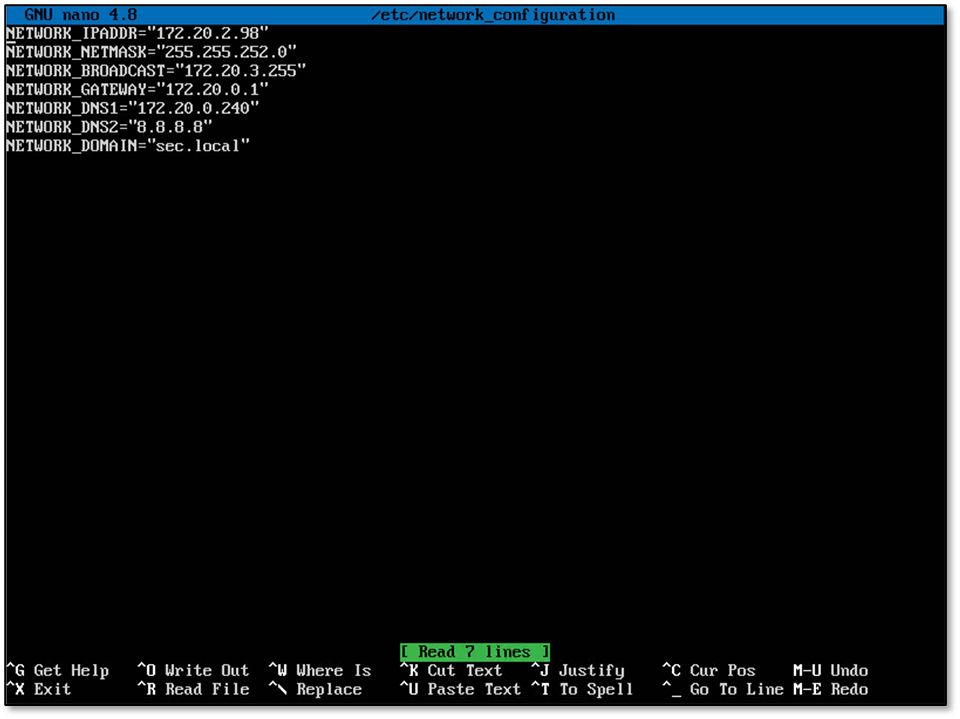
Use the keyboard arrow keys to navigate through the information and make the required changes.
Press Ctrl+O, then Enter to save, and Ctrl+X to exit.
On exit, a prompt to reboot the server will be displayed in order to apply the changes.

Press Y to reboot.
The new network details will be displayed on the VM console window. It may take up to 2 minutes to update and display the new changes.
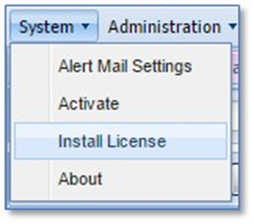
Install a License Key
A new license key for the software will be provided in an email. Licenses can only be installed in the Administrator Console which is found on port 8081.
Copy and paste the above code into the text field located in System > Install License.
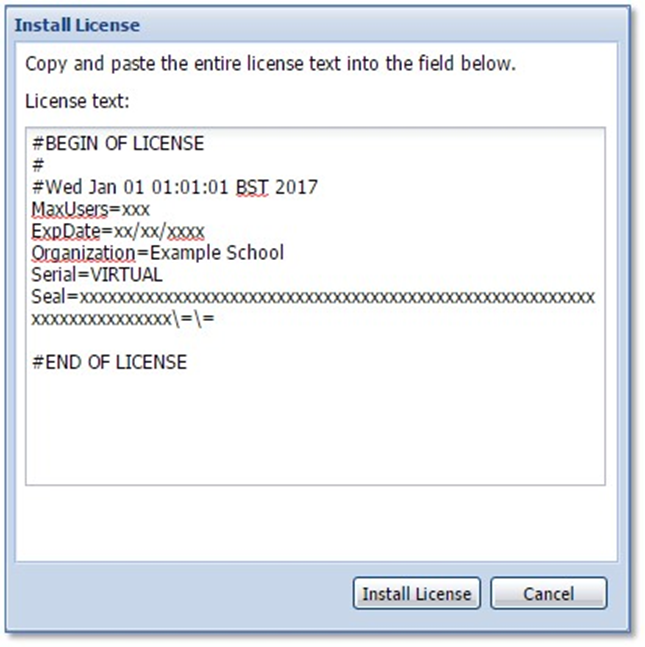
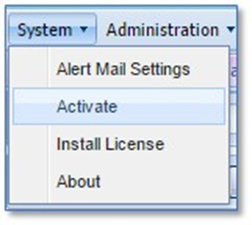
Click Install License to save. Then go to System > Activate and send your Activation Request to the Securus support team (support@securus-software.com).
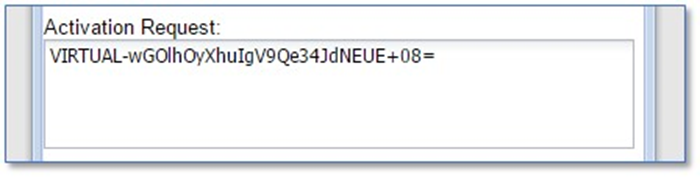
A member of the support team will respond with your activation code, copy and paste this into the box below for the Activation Request box then click Activate.
Post Install
The Securus console will now be accessible on the following addresses.
Securus XT Console
Administrator Console
Webmin Console
The default login credentials for Securus are:
Username:
admin
Password:
admin
The default login credentials for Webmin are:
Username:
scadmin
Password:
admin
Should you require any help, please contact the Securus helpdesk on the below details.
Email:
Phone:
01372 388 530